Crispy Baked Sweet Chili Chicken (Better Than Takeout)
Crispy baked sweet chili chicken with a glossy glaze — takeout texture, no deep fryer. Ready in 40 minutes, with the timing tricks that keep it crunchy.

The one thing takeout gets right
Takeout sweet chili chicken has one job: shatter on the first bite, then go sticky-sweet. Most home versions miss it — and not because the recipe is hard. The chicken goes soft the second it hits the sauce. The fix isn't a pot of oil. It's a wire rack and about ninety seconds of good timing.
This baked sweet chili chicken recipe gets you crackly, glazed bites — the real takeout texture — with nothing to deep-fry and no second pan to scrub. Start to finish it's about 40 minutes, and it's a genuinely good first-parallel-cooking win: you'll run the oven and the stovetop at the same time and land them together. If you've only ever cooked one thing at a time, this is the recipe that teaches you to juggle two.
I made it the wrong way for years. I'd pan-fry the cornstarch-coated chicken, then tip it straight into a simmering sauce. It tasted great for about four minutes, then turned into soft, sticky nuggets. The move that fixed it was almost annoyingly simple: bake the chicken on a rack so hot air hits every side, and don't let the sauce anywhere near it until the very end. Crunch is a texture you build and then protect.
What you'll actually learn
Two techniques here travel a long way past this one dish.
First, the oven-fry. An egg wash plus a cornstarch coat, baked on a rack, gets you fried-adjacent crunch with no oil. That exact trick works on tofu, shrimp, cauliflower — anything you want crisp without a fryer.
Second, reducing a glaze to gloss. You'll simmer the sauce until it turns from watery to shiny and coats the back of a spoon. Learn to see that moment and you can build a glaze for salmon, meatballs, or wings without a recipe in front of you.
Ingredient notes
Nothing here is hard to find, but a few swaps are worth knowing before you shop:
- Chicken breast keeps it lean. Boneless thighs also work and are more forgiving if you tend to overcook — just give them a couple extra minutes.
- Cornstarch is the crunch. Don't swap flour one-for-one; flour bakes up bready, not glassy. Potato starch is an even crispier option if you keep it around.
- Sweet chili sauce is the backbone. The bottled stuff is genuinely good here — Mae Ploy is my default — so don't overthink it.
- Low-sodium soy sauce lets you control the salt. For gluten-free, use tamari; the glaze won't know the difference.
Allergen flags: this has egg, soy, and sesame, and standard soy sauce contains wheat (gluten). Sweet chili sauce is usually gluten-free, but check the label if that matters to you.
The game plan
Here's where cooking two things at once earns its keep. The chicken bakes for 15–20 minutes; the glaze simmers for 5. Do them back to back and you're standing around. Overlap them and you're done in one clean stretch — which is exactly the choreography the app runs for you.
Turn the oven to 400°F (200°C) and let it come up to temp while you cube the chicken and set up the dredge. The moment the tray goes in, start a timer and call it "Bake." Then walk straight to the stove and start the glaze — name that one "Glaze."
The glaze will finish about ten minutes before the chicken does, and that's fine. Pull it off the heat and let it wait. A reduced glaze reheats in seconds, and getting it off the burner keeps it from tightening into candy.
Tips that actually matter
- Pat the chicken bone-dry before it meets the egg. Surface water is the enemy of crunch — it steams instead of crisping. This is the single biggest lever you have, and it's free.
- Give the pieces room on the rack. Crowd them and they trap steam and stay pale; space them out and hot air crisps all sides. Around the 12-minute mark, listen for the sizzle to settle into a quiet, steady crackle — that's your color developing.
- Check doneness with a thermometer, not the clock. Chicken is safe at 165°F (74°C) in the thickest piece. A 1-inch cube gets there quickly, so start checking at 15 minutes.
- Know when the glaze is done: it should coat the back of a spoon, and a finger swiped through it should leave a clean line that holds. Watery means keep going. Syrupy and shiny means stop.
If it starts going sideways
- Glaze reduced too far and went sticky? Off the heat, whisk in a tablespoon of water at a time until it loosens back to a pourable gloss.
- Chicken's not crisp when the glaze is ready? Don't toss it yet. Hold the glaze off the heat and give the chicken 3–4 more minutes. Sauce is patient; crunch is not.
- Bites came out pale instead of golden? They were probably crowded, or the oven wasn't fully preheated. Next time, preheat longer and leave a thumb's width between pieces.
Make it yours
- Add heat: a spoonful of sambal or sriracha in the glaze takes it from sweet to sweet-and-hot.
- Swap the protein: the same method works on pressed tofu, on shrimp (bake closer to 8 minutes), or on cauliflower for a meatless version.
- Serve it over jasmine rice with the extra glaze spooned on top, or piled into crisp lettuce cups.
Next on the skill path: once running the oven and stovetop together here feels easy, try a quick stir-fry. Same "everything overlaps" brain — just faster.
Cook it hands-free
This recipe is really a two-timer cook: one for the bake, one for the glaze, landed together. Want it to run itself? That's exactly what Blue Sous Chef does. It starts and names your timers, walks you through each step out loud so you never touch a greasy screen mid-cook, and checks the chicken actually hit 165°F before it lets you plate. Cook it hands-free at bluesouschef.com.
Make it once while paying attention to the timing, and you won't go back to the soggy version. That first crackly, glazed bite is the whole reward — go get it.
Crispy Baked Sweet Chili Chicken (Better Than Takeout)
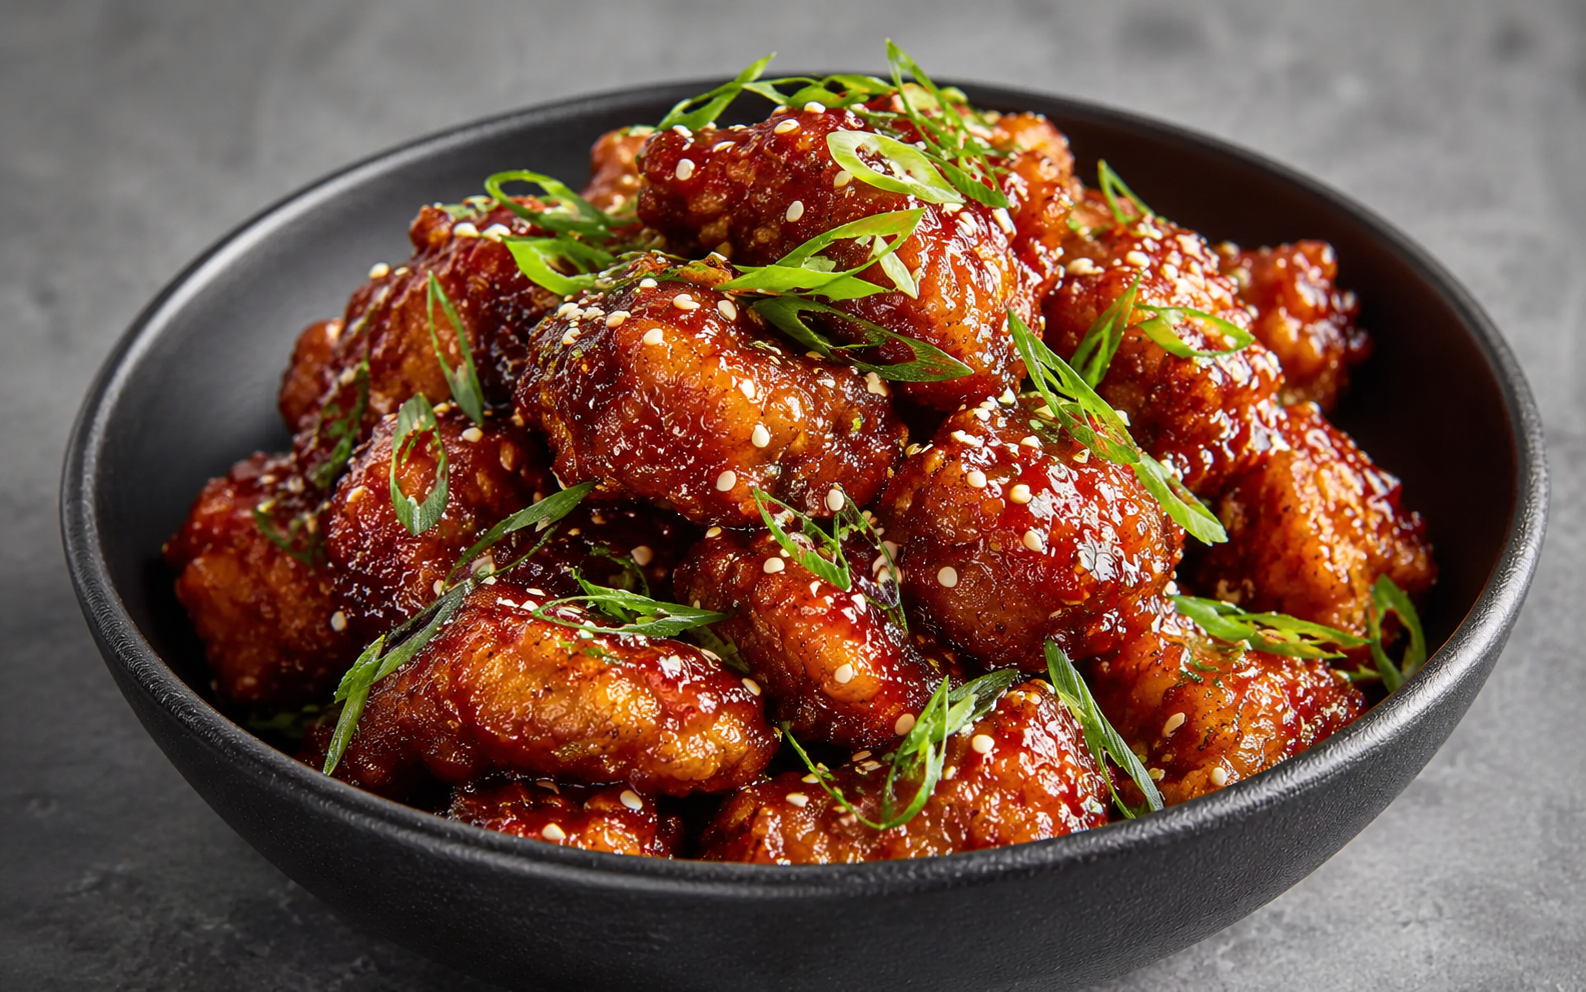
Crispy baked chicken bites in a glossy sweet chili glaze — the takeout texture, no deep fryer. Finished with sesame seeds and green onions.
Ingredients
- 1.5 lbs chicken breast cut into 1-inch cubes (680g)
- 1/2 cup cornstarch 64g
- 2 large eggs beaten
- 2 tsp garlic powder 10g
- salt & pepper to taste
- 1 cup sweet chili sauce 240ml
- 2 tbsp soy sauce 30ml, low-sodium (use tamari for GF)
- 1 tbsp rice vinegar 15ml
- 1 tbsp fresh ginger 15g, grated
- 1 tbsp white sesame seeds 9g
- 1/4 cup green onions 25g, finely chopped
Equipment
- Baking sheet Large, rimmed
- Wire rack Fits inside the baking sheet
- Small saucepan For reducing the glaze
Instructions
- Preheat the oven to 400°F (200°C) and set a greased wire rack inside a large rimmed baking sheet. Pat the chicken cubes completely dry — this is what makes them crisp.
- Dip the chicken in the beaten egg, then toss in the cornstarch, garlic powder, salt, and pepper until every piece is fully coated.
- Space the coated chicken out on the rack so the pieces don't touch. Bake 15–20 minutes, until golden and crisp at the edges and the thickest piece reads 165°F (74°C) internally.
- While the chicken bakes, combine the sweet chili sauce, soy sauce, rice vinegar, and grated ginger in a small saucepan. Simmer about 5 minutes, until thick and glossy enough to coat the back of a spoon, then pull it off the heat.
- Toss the hot chicken in the warm glaze until coated. Finish with sesame seeds and green onions, and serve right away.
Notes
Pat the chicken bone-dry before coating — surface moisture steams instead of crisping, and dry chicken is the single biggest lever for crunch. Don't sauce the chicken until the very end so it stays crisp. For gluten-free, use tamari in place of soy sauce and check your sweet chili sauce label.
FAQ
Keep the components separate. Bake the chicken and make the glaze, then refrigerate them apart. Re-crisp the chicken in a hot 400°F oven for 5–7 minutes, warm the glaze, and toss just before serving — combining them early is what turns it soggy.
Yes. Air-fry the coated chicken at 400°F for about 10–12 minutes, shaking the basket halfway, until golden and 165°F inside. Make and add the glaze exactly the same way.
Almost — cornstarch and most sweet chili sauces are gluten-free, but standard soy sauce contains wheat. Swap in tamari and double-check your sweet chili sauce label and the whole dish is gluten-free.
Usually one of two things: wet chicken (pat it bone-dry before the egg) or a crowded rack (trapped steam keeps it pale). Space the pieces out and give the oven time to fully preheat.
Steamed jasmine rice catches the extra glaze, and a crunchy cucumber salad or slaw balances the sweetness. It's also great piled into lettuce cups.
Blue Sous Chef is free on the App Store — voice-guided steps, named timers, and a coach that answers mid-recipe, all without touching your phone.